Top Five Mesa Restaurants

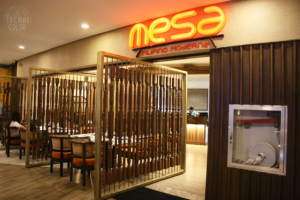
Mesa’s unique balance of 21st-century innovation and Southwestern history is reflected in its dynamic culinary scene. Whether you’re looking for family-friendly restaurants or a romantic spot to dine with your loved one, the city offers endless mouthwatering options. Click Tom’s BBQ to learn more.

This spot is a favorite among locals for its fresh and delicious sandwiches. It also serves a wide variety of soups and salads. The restaurant has indoor and outdoor seating and offers excellent customer service.

Two Hands Korean Corn Dogs is one of the latest food businesses to open up in Mesa. This unique restaurant is the perfect place to try something new, and it offers a variety of options that are sure to please everyone’s taste buds. The menu is simple, and you can customize your order by choosing a type of filling.

You can also get some of their signature sauces on top, like the sweet ranch and cheetos powder. The most popular menu item is the K-Classic, a half-mozzerella and half-sausage corn dog that’s fried crisply and drizzled with their signature sweet ranch sauce. The Potato Corn Dog is another popular menu item that features a crispy rice topping.

When it comes to food, Mesa is truly a city of culinary wonders. Its restaurants feature a wide range of dishes from around the world, and its coffee shops are known for their high-quality coffee and pastries. The city is also home to a number of celebrity chefs, who have earned the city a global reputation for its cuisine.

There are many ways to experience the best of Mesa’s restaurants, from casual dining and takeout to fine-dining and wine bars. However, there are some things that you should keep in mind when choosing a place to eat. For example, look for a restaurant with a high customer rating on Uber Eats. This will help you avoid a bad experience and find a restaurant that is right for you.

Located near ASU’s campus, this trendy spot is the perfect destination for a night out on the town. Featuring a modern atmosphere and an expansive patio, this eatery offers a wide selection of drinks and cuisines. The food is also delicious, and the menu is very affordable.

If you’re in the mood for a quick bite to eat, Postmates is a great option. This app makes it easy to get delivery from your favorite local restaurants and stores in Mesa. Simply enter your address to view a list of nearby restaurants and stores. Choose from a wide range of cuisines, including Italian, Fast Food, and more.

Que Chevere

After four years running the Venezuelan food truck Que Chevere, owners Maria Fernanda and Orvid Cutler decided to open a brick-and-mortar restaurant in downtown Mesa. The eatery serves classically Venezuelan offerings in a down-to-earth setting with a bar and sidewalk terrace. The menu features arepas, thick griddled corn flatbreads that serve as sides or as a vessel for fillings like shredded beef and black beans, along with other sleeper hits including patacon (sandwich bunned on fried plantains) and cachapa, a corn pancake packing hauntingly nuanced sweetness.

Located on a block of Main Street dominated by vintage stores and bike racks, the interiors at Que Chevere are bright and cheerful. The kitchen churns out hot, stretchy tequenos — Venezuelan cheese sticks — every morning and offers curbside pickup for takeout orders. There’s also a call-in number for dine-in customers to reserve tables.

Although Que Chevere is a newer restaurant, it’s already becoming a destination for local Venezuelans. The owners’ passion for sharing their culture is apparent in the authentic food they serve. The food here is rich in flavor and incredibly comforting.

The menu at Que Chevere consists of dishes that are traditional to Venezuelan cuisine, such as arepas, empanadas, and cachapas. The restaurant also offers other popular Latin American dishes, such as Arroz con Pollo, a hearty and satisfying dish that features tender chicken cooked with aromatic saffron rice. The restaurant also has an impressive selection of vegetarian and seafood dishes.

Among the dishes on the Que Chevere menu are Camarones al Ajillo, which is a delectable plate of succulent shrimp served in a savory garlic butter sauce. The sauce is bursting with bold flavors, including a generous amount of minced garlic and crushed red pepper flakes, and the shrimp are perfectly seasoned. The grilled pork chop Chuleta Can-Can is another dish on the Que Chevere menu that should not be missed. The meat is smoky and juicy, with a perfect char on the outside. The accompanying mojo sauce is equally tangy and savory, making this dish a true delight.

The staff at Que Chevere is friendly and helpful, and the restaurant provides quick service to all customers. The menu is affordable, and the restaurant has a wide variety of food options to suit any taste. The restaurant also has a large variety of beverages, including fresh fruit juices and bottled beer.

Worth Takeaway

Worth Takeaway, a downtown Mesa sandwich shop that specializes in locally sourced ingredients, offers a variety of different sandwiches and beverages. Its sandwiches are a great choice for lunch or a quick dinner. It also has a small breakfast menu with items like croque madame, hash, and granola with jam. Its minimalist ambiance and outdoor patio make it a cozy place to sit and enjoy a meal.

Located on Main Street, Worth has become a popular destination for locals to grab a bite to eat and drink. Its sandwiches are made with a combination of high-quality ingredients and locally-baked bread. The sandwich shop is known for its creative twists on classic sandwiches and for offering a variety of unique options for diners. For example, it offers a BLT with candied bacon, which is a new twist on an old favorite.

In addition to the sandwiches, Worth also offers a variety of drinks and desserts. Their banana pudding is a must-try and their lavender rosemary soda is delicious. The staff at Worth is friendly and knowledgeable, and they are happy to help you decide on what to order.

The Worth team is passionate about local food, and they are always experimenting with new ideas. They use the highest quality ingredients and put a lot of thought into their recipes. They are constantly looking for ways to improve their food and serve their customers the best.

For those who want to get their meal delivered, there are many different restaurants in Mesa that offer delivery services. Some of the most popular restaurants include Venezias New York Style, Ginger Zing, Hive48 Natural Sweets & More, Zio’s Pizza and Wings, and Guru Palace Cuisine of India.

Uber Eats makes it easy to discover local restaurants and have them deliver to your home or office. You can browse tons of restaurant options and even track your order by the minute. You can also order from a favorite restaurant and have it delivered for free with the Uber One option.

Mesa is a growing culinary hub and is home to several unique restaurants and cafes. Some of the city’s most popular dishes include poke bowl and wings. Other notable restaurants in the area include Two Hands Korean Corn Dogs, Que Chevere, and Myke’s Pizza.

Myke’s Pizza

Myke Olsen, the man behind Myke’s Pizza, left a career in accounting to follow his passion for hand-crafted pizza. Olsen’s careful recipes and a crust that carries the warmth of great bread have made him one of the Valley’s top pizza makers. He slings artisan wood-fired pizzas, appetizers and desserts that are best known for the unexpected use of fruit on pizza, as well as white pies like his seasonal Cherry Pizza with fresh mozzarella, lemon-soaked cherries, Manchego cheese and aged Gouda. The family-friendly restaurant shares space with Cider Corps and Pair Cupworks in Downtown Mesa. Pizzas can be enjoyed inside the taproom or take away.

How Drywall Is Made and What Makes It So Useful

Drywall Las Vegas, also known as wall board or gypsum board, is found in every home and business. It’s one of the most common construction materials in the world, but many people don’t need to learn how it’s made or what makes it so useful.

Hanging drywall is a labor-intensive project that should only be done by professionals. Proper preparation of the area is important before starting the process.

Gypsum is a naturally occurring, soft sulfate mineral with the chemical formula CaSO4*2H2O. It occurs worldwide in sedimentary rock formations. Gypsum is mined and then processed to create a variety of construction products, including gypsum board, plaster, and other building materials. It has many uses due to its low cost, fire resistance, and sound-dampening characteristics.

One of the most common gypsum uses is creating drywall, also known as gypsum wallboard or plasterboard. It is a key panel ingredient, along with paper facing and backing. The board provides a fire-resistant, soundproof surface that can be decorated with decorative moldings and patterns.

Drywall is manufactured by first calcining the gypsum, which is heated to remove some of its water content. The resulting powder is then rehydrated, or reconstituted, with water to create a slurry that can be spread onto a moving continuous sheet of paper, sandwiched with another layer of paper, and sent to a kiln for final drying. The result is a flat sheet of wallboard with a non-combustible core that is easy to install.

Gypsum is also used to make stucco, which is a type of wall finish that can be textured or colored. It is applied as a thin coat to walls or ceilings to add texture and provide an attractive surface that resists fire and absorbs sound. It is also used to create moldings, such as crown molding and baseboards.

One of the most important properties of gypsum is its ability to rehydrate when exposed to moisture. This property is exploited in the production of gypsum board, which can be reconstituted by adding water to the slurry. This rehydration process also makes gypsum resistant to fire, which is why it is an integral component of the drywall that is used in homes.

When gypsum is disposed of in unlined C&D debris landfills, it may leach into groundwater. This contaminates the water with sulfate, which can exceed the US secondary drinking water standard of 250 mg/L. This has led to stricter actions on the part of landfill operators and has prompted some communities to ban gypsum from disposal in their C&D landfills.

Paper or Fiberglass Backing

Whether you are a professional contractor or a DIYer with an eye for detail, the type of tape you use to seal drywall joints has a significant impact on how well your project turns out. When it comes to drywall tape, there are two primary contenders: paper and fiberglass. Each type of tape offers unique characteristics, and understanding them can help you decide which one is the best fit for your project.

Paper drywall tape is a traditional option that many contractors and DIYers choose to use. It features a paper backing that allows it to stick to drywall and joint compound. It also lays flat and smooth, making it ideal for projects where appearance is a priority. Additionally, some varieties of paper drywall tape are treated with mold-resistant additives, allowing them to be used in spaces where mildew or mold growth could be an issue.

Unlike traditional paper tape, fiberglass-mesh tape has its own self-adhesive properties, eliminating the need to embed it in a layer of joint compound. This speeds up the taping process and ensures that the tape will lie flat on the drywall surface when it is dry. Additionally, fiberglass mesh tape is strong enough to resist tearing and stretching, making it a good choice for areas that will be subject to frequent moisture or heavy loads.

Fiberglass-mesh tape is also a good choice for areas that are prone to moisture and humidity, such as bathrooms or basements. It is resistant to mold and moisture, and can be used in conjunction with conventional ready-mixed or setting drywall joint compounds. However, it is important to note that repeated joint strength tests conducted by USG found that joints taped with fiberglass mesh tape and conventional joint compounds are more prone to cracking than those taped with paper tape and setting drywall joint compound.

Taping

Drywall tape is what hides the seams and joints between drywall sheets. It is not self-stick, as many mistakenly believe, but is held in place with a layer of drywall joint compound, also known as “mud”. There are several types of drywall tape available and which one you choose depends on the type of project and your skill level.

Paper tape is the most common choice for new construction or repairs and works with both drying-type or setting-type mud. It is inexpensive, easy to work with and non-elastic which helps strengthen the joints. It is recommended for butt joints where the panels meet at square (not tapered) edges.

Mesh tape is a good option for corners and other tight areas where a strong bond is necessary. It is not as expensive as paper tape and is more flexible and durable. It is non-elastic, which makes it strong at the corners and tight areas. It also requires less mud than paper tape and is resistant to mold, which makes it ideal for humid applications.

There are even self-adhesive options for drywall tape. These eliminate the need for a first bedding coat of compound but are less forgiving than traditional paper tape. They are also more difficult to smooth and are not recommended for beginners.

For fire rated projects, there is a special fire-resistant drywall tape that offers additional protection for occupants and owners during a fire. It can be used in place of regular drywall and is often combined with other fire-rated products such as wallboard or insulation.

Proper taping is an art and takes some practice, but it is essential to a successful drywall project. It is important to use a light touch and not press too hard into the mud, as this can cause bubbles and make the mud stiff and difficult to work with. It is also helpful to put newspaper or plastic tarps under your work area until you get the hang of it. For a professional look, be sure to smooth out the top of the mud with a drywall knife and feather the edges so it blends into the adjacent wall surface.

Finishing

Finishing is a key step in the drywall process and requires a steady hand, attention to detail, and patience. During this phase, the drywall is covered with a final coating of joint compound that covers any imperfections and makes the wall or ceiling smooth for painting.

The level of finishing you choose for a room or wall will determine how much effort and expense it takes to get the job done. For example, a simple bathroom or laundry room may only require a level 1 finish, which involves the flat joints and interior angles being taped and coated with mud once. This is sufficient for basic functionality and hiding tool marks, but it will not hide ridges or shallow or hollow areas in the drywall.

However, if you are planning to install a fireplace or use the room as a home theater, you will want a higher level of finishing, such as a Level 4 finish, which is the highest standard for professional work. This level of finishing requires all flatts, butts, angles, and corner bead to be taped, and each area to be coated three times with mud. The drywall contractor will then wipe the surface of the mud to leave only a thin coat over the tape, fasteners, and accessories. This will provide a smooth, uniform, and attractive surface that conceals all tool marks and ridges.

In addition to the drywall sheets, tools, and supplies described above, you will also need to have the following materials:

A 5-gallon bucket of fast-setting mud.

All-purpose drywall joint compound.

A 6-inch taping knife for applying the mud to joints and touch-ups.

Sanding sponge – This can be handy in areas that your hand sander can’t reach.

Marking chalk – This is helpful in keeping track of the touch-up spots you’ll need to do later.

After the final layer of mud is dry, it should be lightly sanded with a 120-grit sandpaper to smooth it and remove any remaining blemishes or uneven spots. Then, you’re ready for the next step in your drywall project: priming and painting.

Become a Plumber

Plumber Sarasota installs and repairs piping, fixtures and appliances that supply drinking water, remove waste, and regulate indoor climate. They read blueprints and building codes to determine the location of plumbing systems, and use specialized tools to troubleshoot problems such as leaks and clogs.

Plumber

Most plumbers begin their careers with an apprenticeship, which provides classroom instruction and paid on-the-job training. After completing the program, they must pass an exam and obtain a license before working independently.

The field of plumbing is highly technical and requires extensive hands-on training. Plumbers must be comfortable working with tools and other equipment, including advanced technologies such as pipe inspection cameras and digital water heaters. A strong work ethic and a commitment to customer satisfaction are also important qualifications for this career.

Getting certified as a plumber typically requires an apprenticeship, meeting minimum educational requirements, and passing a licensing exam. Apprenticeships are available through trade schools and community colleges, and some vocational programs include on-the-job training opportunities that allow you to earn while learning. A master plumber must also complete a certain number of continuing education courses each year to keep their license up-to-date.

To get started, look for schools with experienced faculty and facilities that can provide you with the necessary hands-on skills. It is also important to consider how long the program will take and if it fits your schedule. You may also want to ask about scholarships and financial aid options, as these can help make a school more affordable.

Some community colleges and vocational schools offer certificate programs that focus specifically on plumbing. These programs are shorter than a traditional associate’s degree, and they can give you the skills you need to start a career in the field.

Other schools offer more in-depth bachelor’s degrees that can provide a well-rounded education while you study subjects like math, blueprint reading, and plumbing systems design. This type of degree can help you qualify for more advanced roles in the plumbing industry, such as a journeyman plumber or a master plumber.

In addition to formal education, you can also find specialized training from manufacturers or online that can help you learn more about specific products and systems. Keeping up with these types of advancements in the field can help you build your career and make you more marketable to employers. You can also pursue additional certifications in areas such as pipefitting, green plumbing, and steam fitting. These certifications can often lead to increased pay and job opportunities.

Apprenticeship

As a plumber, you can work in a wide variety of settings, from residential to commercial and industrial. Each setting offers unique challenges and opportunities to learn, from repairing toilets to designing plumbing systems. As you gain experience, you may also be entrusted with more complex tasks, such as analyzing and diagnosing plumbing problems or managing larger-scale projects.

The best way to get started in the industry is through an apprenticeship, which combines on-the-job training with classroom instruction. These programs last for around five years and are available through trade schools, community colleges and local unions. Choosing an apprenticeship program that has been approved by the state or federal government ensures that it adheres to rigorous standards.

Some high school programs offer a pathway into an apprenticeship, such as Career and Technical Education (CTE) programs through BOCES. These programs offer specialized courses in plumbing and can prepare students for hands-on work.

Regardless of how you choose to begin your apprenticeship, it is important that you remain engaged throughout the process. Keeping in touch with supervisors, expert apprentices and mentors is key to getting the most out of your apprenticeship. Be sure to ask for feedback and clarification on any doubts or questions you might have as you learn new skills.

There are many resources online to help you find an apprenticeship opportunity in your area. Searching by location, type of job and experience level will provide a list of options. Applying to an apprenticeship typically requires a resume and a personal interview. Many programs also have specific qualifications that must be met, such as a high school diploma or equivalent and the ability to pass a background check.

Licensing

In some states, aspiring plumbers must become licensed to work on plumbing systems in residential and commercial settings. Obtaining a license involves passing an exam and meeting experience requirements, which vary by state. Those interested in becoming licensed plumbers should seek out career and technical education (CTE) programs that offer a pathway to apprenticeships.

Apprenticeships, which are sponsored by trade unions and employers, provide hands-on training to aspiring plumbers. They typically last four to five years and include classroom instruction, as well as paid on-the-job training. Many vocational schools and community colleges have CTE programs, and some offer specialized certificates in areas such as plumbing technology.

Plumbers install, maintain, and repair water supply lines, drainpipes, toilets, faucets, sinks, showers, and other household fixtures. Their job duties may also include inspecting work sites, ensuring that plumbing meets local codes and regulations, and obtaining permits for construction projects. Some plumbers also operate their own businesses, which requires a business license, workers’ compensation insurance, and liability insurance.

As a skilled trade, plumbing offers competitive wages and excellent employment opportunities. However, plumbers must be willing to work in a variety of weather conditions and with complex plumbing equipment that can be difficult to troubleshoot. In addition, the work can be physically demanding, requiring plumbers to lift heavy objects and to crawl into tight spaces. Plumbers are also exposed to potential health risks, such as contact with sewage and human waste, which can contain infectious diseases such as cholera, typhoid, hepatitis, cryptosporidiosis, and ascariasis.

Plumbers who operate their own companies must meet a number of licensing and regulatory requirements, including carrying workers’ compensation and liability insurance, and posting a cash deposit or surety bond. They must also have a valid license from their city and carry a minimum of 8,000 hours of on-the-job experience, as well as pass an exam. Most municipalities require that plumbers obtain a master plumber’s license, which is a higher level of licensure than journeyman licenses and demonstrates an ability to perform the full range of plumbing tasks. Many plumbers pursue this level of licensure after completing an apprenticeship and earning their journeyman license.

Certification

The craft of plumbing is a centuries-old and crucial trade. It involves the maintenance, designing, assembling, installing, and repairing of various piping systems in homes and businesses. The skills required for this trade demand attention to intricate details and can be complex. For those interested in becoming plumbers, there are several programs available to meet their educational and training needs.

The first step is to enroll in a vocational plumbing certificate program. The curriculums vary, but most will require a high school diploma or GED certificate, as well as a minimum cumulative grade point average (GPA). The next step is to apply for an apprenticeship through a local contracting company. Many programs pair beginners with experienced journeymen who offer hands-on training while the beginner attends classes. This approach allows the apprentice to earn a paycheck while working toward earning his or her master plumber’s license.

Once the apprentice has met all of the educational and practical requirements, he or she can apply for the license exam. The licensing requirements differ by municipality. 

In addition to meeting state and local licensing requirements, plumbers must also obtain the appropriate insurance coverage. It is recommended that they obtain both general liability and workman’s compensation. It is important to remember that the insurance coverage required will depend on the individual’s scope of work.

Plumbers may also choose to take continuing education courses. These courses can help them stay abreast of the latest plumbing trends and technologies. Additionally, they can help them meet the requirements set by their respective states for keeping their licenses active.

While pursuing a plumber’s license and certification, it is important to have excellent customer service skills and be physically fit as the job requires heavy lifting and hours of standing and walking. It is also a good idea to build a professional online presence and join relevant industry groups.

A Complete Guide To Stucco Installation For A Durable Exterior Finish

Dryvit Stucco Installation is a cost-effective, durable, and visually appealing finish for the exterior of a building. However, if not applied properly, stucco can be difficult and expensive to repair.

Stucco has great insulation properties that help keep homes warm in winter and cool during the summer, which can lower energy costs. It is also highly resistant to crumbling, fading, thermal expansion, and chalking.

stucco

Preparation

Stucco is a beautiful exterior finish that can be textured in a variety of ways and painted to create a custom look. It is also very durable and can help keep homes warm in the winter and cool in the summer. It is important to understand how to properly install stucco to ensure a long-lasting and attractive finish.

A professional should always be consulted when installing stucco, as it is more complicated than many other exterior finishes. Stucco is a cement-based material that can be applied over a variety of rigid surfaces including plywood, oriented strand board (OSB), cement board, and exterior grade gypsum sheathing. It can be used over wood framing, masonry walls, and concrete block walls as well. Before the first coat of stucco is applied, it is necessary to prepare the surface of the wall by patching any cracks and repairing any damage. The surface should be clean, free of debris, and wet down thoroughly with a fog spray to improve adhesion and prevent premature drying.

Metal lath should be installed over the sheathing to which the stucco will be applied. This should be nailed or stapled to the sheathing at least every 8 inches. It is important to use galvanized nails or staples when installing metal laths, as they are less likely to rust and loosen over time. The lath should overlap horizontally by 1 inch and vertically by 2 inches to provide a strong base for the stucco. Weep screeds should also be installed along the bottom of the wall to allow water to escape from the stucco.

Corner trim pieces should be secured to all outside corners of the wall. The corner trim should be a matching color to the stucco, and should not be installed until after the base coat has been applied. After the base coat has dried to a thumbprint hardness, it should be textured with a rake or notched trowel. This will give the next coats of stucco a solid surface to adhere to. In addition, it will help reduce the risk of water absorption into the finished product, a common cause of mold and mildew problems.

Scratch Coat

Stucco is a long-lasting material that offers homeowners unique home protection. However, it requires regular maintenance and upkeep to keep its exterior finish in good condition. This makes stucco more expensive than some other types of exterior siding, but it has a high return on investment and increases the value of your home.

The first step of the stucco process is applying a scratch coat to the walls. A scratch coat has the same ingredients as the base coat, but it is a thinner layer that needs to dry for a minimum of 36 hours before application of the next layer. This step is crucial to the success of your project as it provides a rough surface for effective adherence and is an essential foundation layer. Professional contractors understand how important the scratch coat is and will apply it properly to ensure that the rest of the stucco installation will go smoothly.

After the scratch coat is dried, a brown coating, which is also known as the leveling coat, is applied. It consists of Portland cement, sand, and water and is sprayed on the wall with a float. This second coat smooths out the surface of the wall and establishes an even foundation for the last layer of stucco. The brown coat must be allowed to dry for a long time before applying the final plaster.

Once the brown coat is dry, it can be scraped and textured to give the house its desired appearance. Some prefer a smooth finish, while others choose to add different pigmentations before application. This allows the homeowner to customize their home and create a unique look.

Its composite materials naturally deter fire, rot, mold, and termite infestations, making it an effective barrier against inclement weather. Its seamless nature keeps rain and snow from seeping into the walls and prevents air from escaping, keeping your home warmer in the winter and cooler in the summer.

Stucco is also easy to paint, allowing the homeowner to change the color of their home to match the surrounding environment or to simply reflect their taste and style. It is also a material that can easily be stained and sanded, allowing for the removal of blemishes and minor imperfections.

Base Coat

Stucco is a popular choice for exterior walls because it lasts long, can be customized to suit your tastes, and doesn’t require much maintenance. It’s a variety of plaster that’s been around for thousands of years and can take on a variety of looks, including textured or smooth. It also offers a good amount of insulation to your home, cutting down on cooling and heating costs.

The first step in the stucco process is to add a base coat to your home. This is important because it will set the foundation for the other layers to come. A well-installed base coat can reduce the risk of water penetration that can lead to cracking, chipping, and other issues later on in the life of your stucco.

There are several methods for mixing the base coat, but the most common is to pour it into a bucket and use a drill to mix until it has a smooth texture. This is a great method for smaller projects because it allows you to get your mix ready quickly and easily. Another option is to buy a pre-mixed base coat from a local supplier. This will save you time and can be a more cost-effective solution for smaller projects.

After the base coat is poured it will need to dry for a few days before you can begin work on the next step. During this time it’s important to avoid any moisture from getting into the wall assembly, especially at window flashings and roof wall connections. Moisture penetration is a common problem in stucco and can cause significant damage if not addressed properly.

Once the base coat has dried you will be able to apply the brown coat, which will give your stucco its final color. You can choose to skip this step or do it yourself, but be careful when choosing a brown coat because it’s extremely important to get the right shade to ensure your stucco will look beautiful and last a long time.

The thickness of your stucco system will vary depending on a few different factors, the most influential being the system you’re using (three-coat, one-coat, EIFS, etc.). The other factors include the finish you’re going to use and how thick of a texture you’re trying to achieve, which will add additional depth.

Finish Coat

Stucco is an excellent siding choice for masonry or wood-sheathed homes. It is environmentally friendly, resistant to weather elements, and requires little maintenance. In addition, stucco has many advantages over other siding materials such as fiber-cement panels and vinyl siding. However, stucco installation is time-consuming and requires expert knowledge to ensure proper application. While you can choose to work on the project yourself, working with a professional will save you time and money in the long run.

Once the surface has been readied, a concrete bonding agent must be applied and allowed to dry completely. This will give the subsequent stucco layers something to adhere to and prevent water damage.

A thin layer of scratch-coat stucco is then sprayed over the entire surface. This layer is a mix of Portland cement and plaster sand and provides a rough surface for the next coat to adhere to. A racking tool or notched trowel is used to create horizontal grooves on the surface of the scratch coat. These should be about 1/8 inch deep, which will provide a solid base for the subsequent layers of the stucco.

After the scratch coat is applied, a second layer known as the brown coat is sprayed and troweled over the surface of the wall. This smoothes the scratch coat and establishes a level foundation for the final coat. It is made of a mixture of Portland cement, sand, and water. It is important to use cool water, as warm or hot water may cause the stucco to sag.

Before the finish coat is added, the weep screeds are installed along the bottom edge of each wall. These will prevent moisture from pooling on the walls and causing mold or efflorescence. Finally, casing beads are placed around the edges of windows and doors to create clean, finished corners.

Once all the finishing touches are in place, the stucco can be left to cure for up to 21 days. It is important to keep the brown coat moist by misting or fogging it periodically, if necessary, to prevent it from drying too quickly and cracking. In addition, the stucco should be protected from sun and wind to allow for an extended curing period.

How a Birth Injury Attorney Can Help You File a Birth Injury Lawsuit

A successful birth injury lawsuit can help families recover compensation for their incurred damages. These can include medical expenses, therapy and treatment costs, lost income, pain and suffering, and a diminished quality of life.

Your attorney will investigate your case by reviewing the medical records and consulting with experts. They can also negotiate a fair settlement or represent you in court. Click Birth Injury Attorneys to learn more.

Hypoxic-ischemic encephalopathy (HIE) occurs when an infant experiences reduced blood flow or oxygen to the brain. It’s also known as neonatal encephalopathy and perinatal asphyxia. Many things can cause HIE, including problems during labor and delivery or a medical error.

HIE symptoms are usually caused by a lack of oxygen to the brain, ranging from mild to severe. They may include seizures, difficulty breathing, or trouble feeding. It’s important to see a doctor immediately if your child has any of these symptoms.

A healthcare provider will perform a physical exam and run tests to diagnose HIE. They may do an ultrasound or an MRI to check the brain for damage. They will also run blood tests to look for if your baby’s organs have been affected by the lack of oxygen.

The treatment for HIE is therapeutic hypothermia, which involves lowering a baby’s body temperature to protect the brain from swelling. This is the most effective treatment for this condition, but it’s unavailable in all hospitals. If your baby’s doctor didn’t treat your child with this method, they could be guilty of malpractice. Other treatments for HIE may include physical and occupational therapy, epilepsy medications, and a referral to a comprehensive epilepsy center. These interventions can help your baby reach their full potential. However, some babies who have this condition will continue to experience problems, including intellectual disability, behavioral issues, and sensory challenges.

Cerebral palsy

Cerebral palsy is a group of disorders that affect muscle tone, movement, posture, balance and coordination. The condition is caused by damage to parts of the brain that control body movements. The symptoms vary from person to person and may be mild to severe. In some cases, the condition can cause seizures and epilepsy. Symptoms can also include difficulty eating and swallowing.

Children with cerebral palsy are slow to reach developmental milestones like rolling over, sitting up, crawling and walking. They may have stiff muscles and exaggerated reflexes, which are called spasticity, or a combination of stiff and floppy muscles, known as dystonia. CP causes problems with walking, eating and speaking, and can lead to problems with the bladder and bowels, eyesight and hearing. It rarely affects intelligence.

There’s no cure for cerebral palsy, but treatments can help. These treatments include physical therapy, speech and language therapy, and occupational therapy. Some people with CP need surgery. For example, spinal surgery can help relieve back pain and improve walking. It can also prevent the condition from getting worse.

You or your child should visit a healthcare professional for a medical exam, which should include a neurological exam. An MRI, or magnetic resonance imaging, and CT scans are tests that can detect brain abnormalities. They’ll look at your child’s birth history and will conduct a physical exam. They’ll also take blood samples to check for certain health conditions.

Erb’s palsy

When doctors use excessive force during childbirth, they may damage the brachial plexus nerve network. This can cause Erb’s palsy, a condition that causes weakness and/or paralysis in the arm. Symptoms include limited movement in the shoulder, elbow, wrist and hand. Doctors diagnose this condition by taking a history of your child’s symptoms and performing physical examinations. They may also order an MRI or nerve conduction study to test for brachial plexus injuries.

Typically, Erb’s palsy is mild and heals on its own in over 80% of cases. However, treatment is important to prevent stiffness and to speed up recovery. Daily physical therapy and range-of-motion exercises will help keep the shoulder, arm, and wrist from becoming contracted or stiff. In severe cases, doctors may recommend surgery to repair damaged nerves.

Erb’s palsy is a preventable birth injury, and medical professionals should be held accountable for any malpractice that occurs during a delivery. If your child suffers from this condition and it was caused by medical negligence, we can file a legal claim to get compensation for their treatment. Contact us now to learn more about how we can help you and your family. Getting financial assistance through a medical malpractice lawsuit will allow your child to receive the best possible care and improve their chances of making a full recovery. We can even cover the cost of your child’s medical bills and other expenses, if necessary.

Klumpke’s palsy

Klumpke’s palsy is a rare condition that can occur in newborns. It is a type of brachial plexus injury that causes weakness and paralysis in the arm, wrist, and hand. The brachial plexus is a network of nerves that runs from the spine, through the armpit, and down into the arms. This nerve trauma can cause a variety of symptoms, from mild to severe, depending on the severity of the damage.

The injury to the brachial plexus can happen in several ways during labor and delivery, but the most common is when medical professionals use too much force or mishandle a child’s head during delivery. This can result in injuries to the baby’s upper or lower brachial plexus. Both types of injuries can have a significant impact on the baby’s life and cause permanent disability.

Symptoms of Klumpke’s palsy vary from mild to severe, and the type of nerve injury affects the symptoms. The symptoms can include a lack of movement in the arm and hand, a claw-like grip, and numbness in the fingers.

The condition can be prevented by ensuring that parents attend prenatal appointments and follow the advice of their healthcare providers. Doctors should also monitor the progress of the pregnancy and the position of the baby and order a C-section if necessary. This is particularly important when the mother has risk factors for this type of birth injury, such as gestational diabetes or a large baby size.

Shoulder dystocia

During childbirth, shoulder dystocia can occur when a baby’s shoulders become lodged behind a mother’s pubic bone. This can extend the second stage of labor and lead to traumatic birth injuries for both the baby and the mother. According to a 2016 article in Women’s Health, this condition is not always preventable and may even cause long-term problems for the infant. However, medical professionals can recognize the symptoms of this complication and take quick action to resolve it.

When a doctor encounters shoulder dystocia, they must act quickly to deliver the child. This means they will need to use a variety of maneuvers to release the shoulder. These maneuvers include changing the position of the mother, which can widen the birth canal. They might also use a McRoberts maneuver, which involves hyperflexing the thighs. Another common procedure is to use the Woods screw maneuver or the Rubin rotational maneuver. These are specific manoeuvres that all obstetricians should be familiar with and which are practised regularly in maternity units.

These maneuvers are usually successful, but in some cases, they do not work. In these cases, doctors must resort to other, more invasive techniques. This can include the use of forceps and a caesarean section. These procedures are more invasive than a routine vaginal delivery and can cause a number of complications for the mother and infant. They can cause tearing to the cervix, rectum and vagina and can lead to severe bleeding and a complication called uterine rupture. This is a serious medical emergency, and the consequences of a complication from these techniques can be devastating.

Birth trauma

Birth trauma is an emotional or psychological injury caused by a negative experience during childbirth. This can affect the birthing person, birth partner or non-birthing parent and can have long-term effects on their mental and physical health. Symptoms of birth trauma may include severe anxiety and flashbacks. While the condition can be difficult to diagnose, it is treatable with the help of a professional.

Most maternal and infant birth injuries are minor and require no treatment, while others, such as skull fractures and nerve damage, can be life-threatening. A diagnosis of birth trauma is made based on the patient’s symptoms and history. It is important to speak with a healthcare professional as soon as possible to ensure that your symptoms are managed properly. Treatment options for birth trauma are varied and may include cognitive behavioral therapy, family-based interventions, and pharmacological management.

While the cause of birth trauma is unclear, it is thought to be due to a discrepancy between expectations and reality. It can also be triggered by previous trauma. It is important to seek support from friends and family if you have been affected by this type of trauma. This will help you to contextualise the experience and reduce the likelihood that you will carry distressing feelings with you into future births. It is also helpful to talk about the experience with a healthcare professional on the maternity ward or with a mental health therapist outside the hospital.