Drywall Las Vegas, also known as wall board or gypsum board, is found in every home and business. It’s one of the most common construction materials in the world, but many people don’t need to learn how it’s made or what makes it so useful.
Hanging drywall is a labor-intensive project that should only be done by professionals. Proper preparation of the area is important before starting the process.
Gypsum is a naturally occurring, soft sulfate mineral with the chemical formula CaSO4*2H2O. It occurs worldwide in sedimentary rock formations. Gypsum is mined and then processed to create a variety of construction products, including gypsum board, plaster, and other building materials. It has many uses due to its low cost, fire resistance, and sound-dampening characteristics.
One of the most common gypsum uses is creating drywall, also known as gypsum wallboard or plasterboard. It is a key panel ingredient, along with paper facing and backing. The board provides a fire-resistant, soundproof surface that can be decorated with decorative moldings and patterns.
Drywall is manufactured by first calcining the gypsum, which is heated to remove some of its water content. The resulting powder is then rehydrated, or reconstituted, with water to create a slurry that can be spread onto a moving continuous sheet of paper, sandwiched with another layer of paper, and sent to a kiln for final drying. The result is a flat sheet of wallboard with a non-combustible core that is easy to install.
Gypsum is also used to make stucco, which is a type of wall finish that can be textured or colored. It is applied as a thin coat to walls or ceilings to add texture and provide an attractive surface that resists fire and absorbs sound. It is also used to create moldings, such as crown molding and baseboards.
One of the most important properties of gypsum is its ability to rehydrate when exposed to moisture. This property is exploited in the production of gypsum board, which can be reconstituted by adding water to the slurry. This rehydration process also makes gypsum resistant to fire, which is why it is an integral component of the drywall that is used in homes.
When gypsum is disposed of in unlined C&D debris landfills, it may leach into groundwater. This contaminates the water with sulfate, which can exceed the US secondary drinking water standard of 250 mg/L. This has led to stricter actions on the part of landfill operators and has prompted some communities to ban gypsum from disposal in their C&D landfills.
Paper or Fiberglass Backing
Whether you are a professional contractor or a DIYer with an eye for detail, the type of tape you use to seal drywall joints has a significant impact on how well your project turns out. When it comes to drywall tape, there are two primary contenders: paper and fiberglass. Each type of tape offers unique characteristics, and understanding them can help you decide which one is the best fit for your project.
Paper drywall tape is a traditional option that many contractors and DIYers choose to use. It features a paper backing that allows it to stick to drywall and joint compound. It also lays flat and smooth, making it ideal for projects where appearance is a priority. Additionally, some varieties of paper drywall tape are treated with mold-resistant additives, allowing them to be used in spaces where mildew or mold growth could be an issue.
Unlike traditional paper tape, fiberglass-mesh tape has its own self-adhesive properties, eliminating the need to embed it in a layer of joint compound. This speeds up the taping process and ensures that the tape will lie flat on the drywall surface when it is dry. Additionally, fiberglass mesh tape is strong enough to resist tearing and stretching, making it a good choice for areas that will be subject to frequent moisture or heavy loads.
Fiberglass-mesh tape is also a good choice for areas that are prone to moisture and humidity, such as bathrooms or basements. It is resistant to mold and moisture, and can be used in conjunction with conventional ready-mixed or setting drywall joint compounds. However, it is important to note that repeated joint strength tests conducted by USG found that joints taped with fiberglass mesh tape and conventional joint compounds are more prone to cracking than those taped with paper tape and setting drywall joint compound.
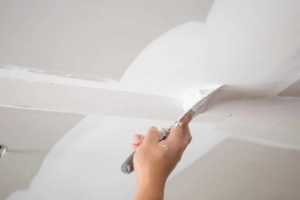
Taping
Drywall tape is what hides the seams and joints between drywall sheets. It is not self-stick, as many mistakenly believe, but is held in place with a layer of drywall joint compound, also known as “mud”. There are several types of drywall tape available and which one you choose depends on the type of project and your skill level.
Paper tape is the most common choice for new construction or repairs and works with both drying-type or setting-type mud. It is inexpensive, easy to work with and non-elastic which helps strengthen the joints. It is recommended for butt joints where the panels meet at square (not tapered) edges.
Mesh tape is a good option for corners and other tight areas where a strong bond is necessary. It is not as expensive as paper tape and is more flexible and durable. It is non-elastic, which makes it strong at the corners and tight areas. It also requires less mud than paper tape and is resistant to mold, which makes it ideal for humid applications.
There are even self-adhesive options for drywall tape. These eliminate the need for a first bedding coat of compound but are less forgiving than traditional paper tape. They are also more difficult to smooth and are not recommended for beginners.
For fire rated projects, there is a special fire-resistant drywall tape that offers additional protection for occupants and owners during a fire. It can be used in place of regular drywall and is often combined with other fire-rated products such as wallboard or insulation.
Proper taping is an art and takes some practice, but it is essential to a successful drywall project. It is important to use a light touch and not press too hard into the mud, as this can cause bubbles and make the mud stiff and difficult to work with. It is also helpful to put newspaper or plastic tarps under your work area until you get the hang of it. For a professional look, be sure to smooth out the top of the mud with a drywall knife and feather the edges so it blends into the adjacent wall surface.
Finishing
Finishing is a key step in the drywall process and requires a steady hand, attention to detail, and patience. During this phase, the drywall is covered with a final coating of joint compound that covers any imperfections and makes the wall or ceiling smooth for painting.
The level of finishing you choose for a room or wall will determine how much effort and expense it takes to get the job done. For example, a simple bathroom or laundry room may only require a level 1 finish, which involves the flat joints and interior angles being taped and coated with mud once. This is sufficient for basic functionality and hiding tool marks, but it will not hide ridges or shallow or hollow areas in the drywall.
However, if you are planning to install a fireplace or use the room as a home theater, you will want a higher level of finishing, such as a Level 4 finish, which is the highest standard for professional work. This level of finishing requires all flatts, butts, angles, and corner bead to be taped, and each area to be coated three times with mud. The drywall contractor will then wipe the surface of the mud to leave only a thin coat over the tape, fasteners, and accessories. This will provide a smooth, uniform, and attractive surface that conceals all tool marks and ridges.
In addition to the drywall sheets, tools, and supplies described above, you will also need to have the following materials:
A 5-gallon bucket of fast-setting mud.
All-purpose drywall joint compound.
A 6-inch taping knife for applying the mud to joints and touch-ups.
Sanding sponge – This can be handy in areas that your hand sander can’t reach.
Marking chalk – This is helpful in keeping track of the touch-up spots you’ll need to do later.
After the final layer of mud is dry, it should be lightly sanded with a 120-grit sandpaper to smooth it and remove any remaining blemishes or uneven spots. Then, you’re ready for the next step in your drywall project: priming and painting.